How To Make Your Images Pop Using 3D Effect in PowerPoint
3D is the biggest Hollywood trend this season. Ranging from
Jame Cameron’s Avatar which transported us to a whole new and beautiful world
of 3D to Avengers: Infinity War, it is anywhere and everywhere.
So, what are these 3D images?
3D images are nothing but illusionary images as they trick
our brain into believing that there is a gap between the foreground and the
background. Obviously, the image is flat but due to how our brain perceives it,
it appears to be 3 dimensional.
Why do we use these in our presentations?
3D can help make your presentations sizzle rather than
fizzle by adding that X factor which is missing in most of the presentations.
Since these 3D images are so persuasive, let us learn how
to create these in PowerPoint and use in our PPT Templates.
Step 1- Select good Images
To create that 3D effect, we want some good pictures that meet these two basic criteria-
High Contrast- The background and the object in the image should have contrasting colors. Make sure that the object does not blend with the background.
Complete Object- The second prerequisite of a good picture is that the object should be complete not cropped.
If the image fulfills both the criteria, choose that image and add it to your slide.
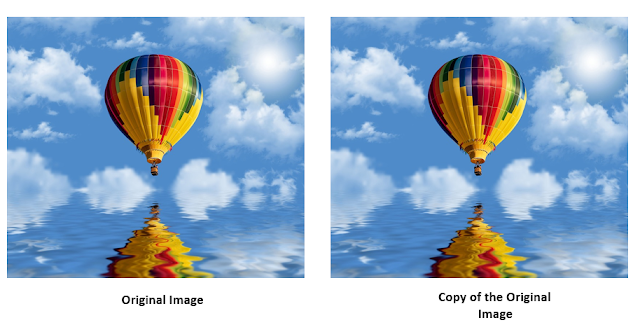
Step 2- Create a copy of your selected Image-
In order to create a 3-D effect, we require two identical
images. Therefore, duplicate your image by selecting CTRL + D command. You
will get two same images.
Note- The second image will be used later.
Step 3- Add a Frame to your first Image
The third step involves framing your original image. To add
a frame to your image, select the original image and click on the Format tab in the ribbon. Then select
the Simple, Frame, White option and
add it to your image.
Step 3- Crop your Image into a Shape-
Along with the picture frame
and the image selected, click on the Crop
tab situated in the right-hand corner. Select Crop to Shape from the dialog box. A shapes gallery appears from
which select the Trapezoid Shape.
Step 4- Resize the
Trapezoid
As the picture has been cropped into the shape of a trapezoid, adjust its angle such that the whole image can be seen
properly, to which you want to add a 3D effect.
In order to resize the trapezoid shape,
select the yellow handle as marked
in the screenshot below.
Step 5- Crop the
Image
With the image selected, click on the Crop command which will add black
dashed lines all around the image. Pull down these black lines and resize the
frame of the picture.
Note- You can crop your image to any size you want,
depending upon how 3D you want your image to look like.
Create the 3D Effect
We will now be working with the duplicate
of the original image that we created earlier ( i.e second image).
Step 1- Remove the
Background-
Select the second image and click on the Format tab in the ribbon. Then select Remove Background.
PowerPoint will automatically determine the Foreground and
the Background of the image. If in case
the automatic selection is not
appropriate use of Mark Areas to Keep
and Mark Areas to Remove commands in
the Remove Background tab.
Note- Be very precise with your background
selection to give a polished look to the image.
After you have
selected the Background of the image, click anywhere on the screen to remove
the background as shown below.
Step 2- Reposition the second Image-
Select the second image (the background of which has been removed) and
reposition it over the original image to create a 3D effect.
Note- You can adjust the size of the
background trapezoid, to give it a more 3D effect.
Some variations of the 3D effect using
3D Rotation
- Select Background Trapezoid. Go to Format> Picture Effects> 3D Rotation. Select the preset of your choice and apply it to your slide. We have selected Perspective: Relaxed Moderately for our image.
- Select Background Trapezoid. Go to Format> Picture Effects> 3D Rotation and select Perspective: Relaxed.
You can create as many variations as you like using 3D
Rotation. Each of the presets given in the 3D rotation menu will give you a
different effect altogether.
Conclusion-
Adding these 3D effects to your presentation will help grab your audience’s attention and transform your oh so boring presentation into a visually stunning one. Create PPT slides with a difference and beat Death by PowerPoint!
Adding these 3D effects to your presentation will help grab your audience’s attention and transform your oh so boring presentation into a visually stunning one. Create PPT slides with a difference and beat Death by PowerPoint!


Comments
Post a Comment